
Whilst I would never describe myself as a competent video producer I do use a lot of video in my lectures to give an idea of what it was like to be on the shoot. They are shot quickly with little preparation and rarely last more than 3 or 4 minutes - I really enjoy creating them and audiences seem to find them interesting. Here’s a 60 second example showing how I shot my High Board Diver images.
I’m often asked how I then incorporate them into my lectures, particularly now that I’m using Zoom to deliver lectures (in these days of lockdown). Here’s my method;
All the videos I use in my lectures are MP4's & embedded in a Microsoft PowerPoint presentation.
- to create slideshows of my images I use the Lightroom Slideshow module & output as an MP4 video
- I shoot videos either with my phone (90% of the footage) or a GoPro. I use software called Camtasia to edit them & output as an MP4
It's easy to incorporate them into Powerpoint - just insert them as you would a JPEG image. The whole presentation then runs from Powerpoint, making it ideal to deliver remotely using Zoom.
For Zoom lectures the only other important thing to note is that when you share your screen with the audience make sure you tick the 2 boxes on the share screen - highlighted in the first image below.
Make sure your Zoom meeting is set up so only one person can share their screen - you’ll not be able to tick the box “Optimize Screen Sharing For Video Clip” otherwise. If you’re hosting you can set this option yourself in your Zoom control panel, otherwise ask your host to make you the host (or co-host) & do it from your “Share Screen” - see second image below.
When you share your screen via Zoom make sure these 2 boxes are ticked
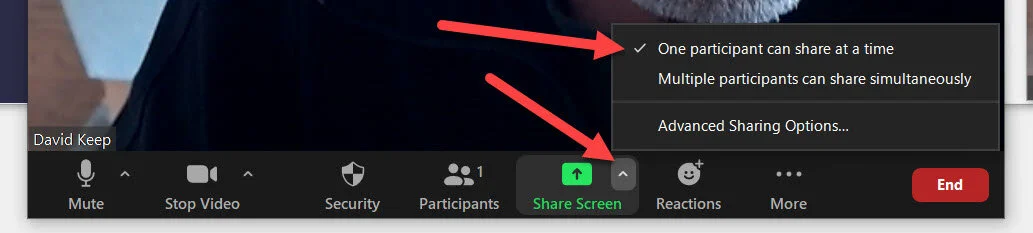
To be able to tick the boxes make sure “One participant can share at a time” is selected